RAP as a Service (RaaS)
- Click ‘Sign in’
-
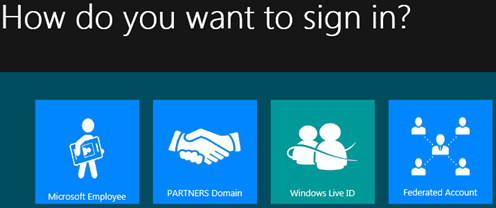
Select how you want to sign in, in our case we will be using our ‘Windows Live ID’
- Click ‘Next’
-
Fill in your credentials and log in
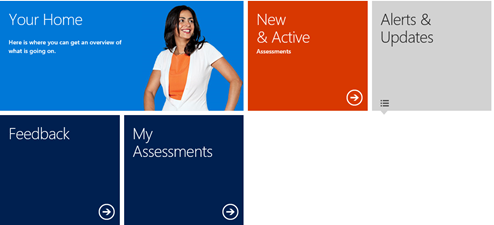
- Click on ‘New & Active’ (On the assesment you want to collect data for)

- Click ‘Download and run’
- Install the client on a server meeting the prerequisites corresponding with your assesment
- Run the ‘RAP as a Service Client
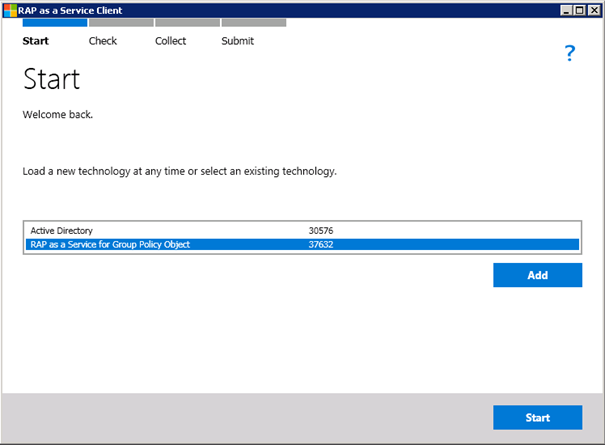
- Select your assesment (technology) and click ‘Start’
The RAP client will now perform a check
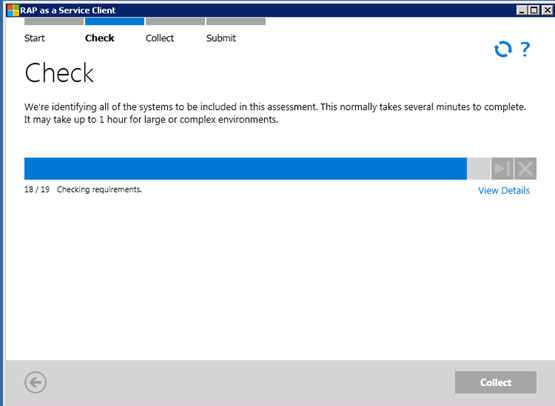
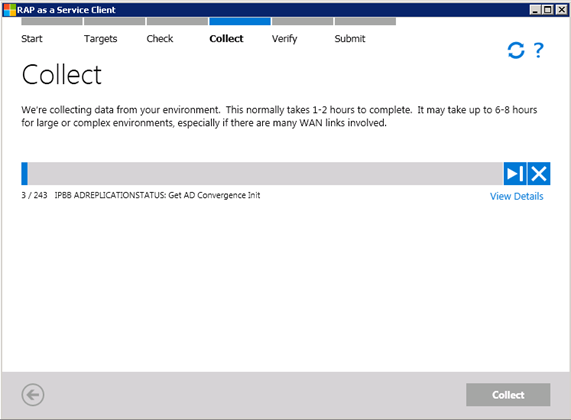
- After the check has completed succesfuly, Click ‘Collect’

The RAP client will now start collecting data from your envirement.
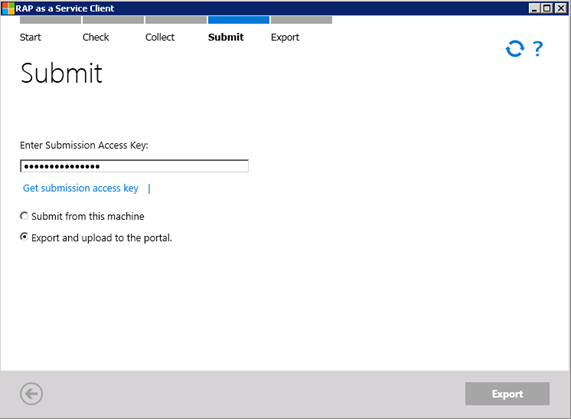
- Click ‘Export and upload to the portal’
-
Navigate to ‘https://services.premier.microsoft.com/assess‘
-
Sign in
-
Clci k on ‘New and Active’
-
Click on ‘view dashboard’
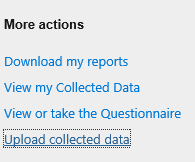
- Click upload ‘collected data’
- Browse to the location of .zip file created by the client when you exported the collection. (Users\Username\Documents\RaaS\RaaS_TECHNOLOGY_VERSION\Upload)
